Showing posts with label Recipe. Show all posts

Tuesday, January 19, 2010

Butterscotch Oatmeal

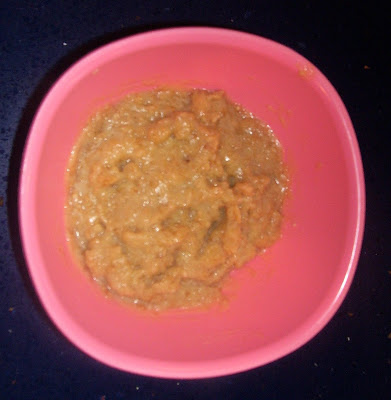
BUTTERSCOTCH OATMEAL
1 egg, beaten

1 3/4 cups milk

1/2 cup brown sugar (can use less)

1 pinch salt

1 cup rolled oat

2 tablespoons butter
In a heavy-bottomed saucepan over medium heat, whisk together the egg with milk, brown sugar, pinch salt and cinnamon (if using). Mix in the oats; bring to a simmer. When the oats begin to boil, cook and stir with a wooden spoon until thickened. Remove from heat and stir in the butter until melted. Serve immediately.

Tuesday, January 12, 2010

25# OF OATS!!!!!

SOOOOO What do you do when you get your Co-oP order of 25# of Oats???You start start searching high and low for recipes to use it up! At .09 a Cup, it is a great deal!!!!!!!!!!!!
Here is the first of many OATS recipes to come!!!!!!

Strawberry Oatmeal Bars

1 cup flour
1 cup rolled oat
1/2 cup butter, softened
1/3 cup light brown sugar, firmly packed
1/4 teaspoon baking powder
1/8 teaspoon salt
1/2 cup strawberry Jam

Preheat oven to 375°F. In a large bowl, mix everything together but the jam. Measure out 2 cups of this mixture. Leave the rest in the bowl and set aside. Take the 2 cups of the mixture and press it into the bottom of an 8 inches square pan, coated with cooking spray. Using a large spoon, distribute jam on top of the mixture in the pan. Spread it evenly all over. Take the remaining mixture and spread it over the jam. Press down lightly. Bake 25 minutes. Remove the pan from the oven and allow to cool for at least 15 minutes before cutting into bars.

Thursday, July 23, 2009

Breakfast Tortilla

WOW, you need to try this!!! A inexpensive alternitive to a great breakfast!
First you will need Tortillas…. I make my own with a recipe I got HERE….(I make up a bunch and freeze them… very convienent!)
Then you just scramble some eggs (I made 10 of these the other day for lunch, I used 12 eggs for the 10 of them) and add Ham or canadian bacon or sausage… whatever suits your fancy!
Lay a spoon full in the tortilla and sprinkle with about 1 T. of cheese. Roll it up and lay it in a baking dish (no need to grease it!) Finish all of the tortillas. Sprinkle cheese all over the tops of them and put them into a 350 deg. oven to bake for 10-15 min or until cheese is melted! Pull them out and serve with salsa if you like! You could also add spinach, peppers, onions, anything you would put into an omelet…. YUM YUM YUM!!!!
The kids loved picking these up and eating them like a taco!!!! Of course I have no photos because these were scarfed down so quickly!

Monday, July 6, 2009

Bread you will LOVE!!!!!!!!!!!!!!!


With my new bread recipe!!! Thanks to my GREAT blog friend DONNA, I was turned onto the urban homemaker and her yummy recipe for BREAD!
Here is a secret! I use WHEY POWDER for the dough enhancer (1 T. for the 2 loaves, which actually makes 3 loaves! The picture shows 2 loaves from the recipe, but they were HUGE and next time I will make 3!!!!!!!) I also use 1 t. Vitamin C powder. The canister will last a LONG TIME!!!!!!!! I do use Coconut Oil for the oil also!!!!!!!! OH, and I added 1/4 C. gluten flour too!
I did figure out that the most costly thing in this is the honey, but a LARGE loaf only cost just under $1!!!!! NOT BAD AT ALL! considering I am using fresh milled Hard White Wheat Berries & Coconut oil. One could do this for much cheaper using cheaper flour and canola or vegtable oil!
I used this recipe for Hamburger buns the other day, and even my picky hubby was super impressed!!!!!!!!!!!!!!!!!!!!!!!!

Wednesday, February 4, 2009

If you haven't yet....

Run HERE and check out my great tutorial on making Caramel Rolls!!!!!!!!! VERY YUMMY!!!!

Monday, January 12, 2009

PIZZA RECIPE!!!!

here it is... the recipe you have been waiting for (or maybe not!)

Pizza Dough

3/4 tablespoon yeast
1 1/2 cups warm water
1 1/2 teaspoons salt
3 tablespoons oil
4 cups flour (we prefer half white, half wheat)

In a large bowl, sprinkle yeast over warm water (I add a pinch of sugar) and allow to set until it begins to foam, about 5 minutes.
2Stir in salt, oil and half of flour. Gradually add remaining flour, mixing well.
3Knead 8-10 minutes or until smooth and elastic. Place in greased bowl and let rise until double (1/2-1 hour) Punch down and divide. Pat out on two pizza pans.

Spread with SAUCE:

2 C. Tomato Sauce
1 t. Oregano
1/2 t. Salt
1 T. Olive Oil
2-3 T. Parmesan Cheese

Mix and heat until it starts to bubble.

add your toppings and cheese. Bake at 400 for 20-25 min!

YUMMMMM!

Sunday, January 11, 2009

PIZZA! FOR UNDER $6!


OK, so last weekend on our day OUT.... we bought 2 family size Papa Murphys Pizzas for my sisters house... they cost us $22 ... OUCH!!!!!! almost 1/2 of our OUT TO EAT budget GONE in PIZZA!

SOOO Trev had a friend over on Friday after school and wanted Pizza... SO, I of course made Home Made pizza as always (Recipe will be posted tomorrow)....

Either way, here is the break down of cost....

-$1 for crusts

-$4.50 for cheese (we LOVE CHEESE...LOL, we would have done about $1.50 in Pepperoni, but didn't have any on hand.

-$.50 for Misc (seasonings for sauce, Olive Oil, etc...)

-$0 for tomato sauce (from the garden)

SOOO, $6.00 for 2 Pizzas that fed 7 people... (ignore the fact that the rectangle one is darker, a few of us like it that way!) Plus we had some apples ($2) and some carrots ($1) and some milk ($1)
I mean really I could make almost 8 pizzas for the money we spent last saturday....


AND lastnight the kids and I made Snickerdoodles (Jims Favorite cookie EVER)!
The break down... $2.55 and it made 84 cookies! SOOO a small $.03 a cookie YUM!


Monday, December 15, 2008

My Favorite Sandwich Bread!

(WHY does it upload photos sideways???? I have tried 7 times and this is just the way it will have to stay since I can't fix it... anyone know how??????????)

OK, after many trial and errors and many loaves of bread my hubby didn't want to eat... I took my recipe and changed it up a bit to get a soft roll like bread that my hubby actually likes ALMOST as much as store bread! I love White Whole Wheat Flour from King Arthur. I also use their unbleached flour. Someday I will have a grain mill of my own and life with be rainbows and bluejays! But for now, this is the flour I am IN LOVE WITH! You can also use Honey instead of sugar, but we really don't care for the taste ourselves. To know if the water is WARM enough, I stick my pinky in it and if it is hot, but not too hot on the pinky (like you don't want to pull it out right away) then that is the PERFECT WARM for yeast! OH, I almost forgot... sometimes if I have POTATO WATER (water saved from cooking potatoes in) I will use that in place of the water. Yeast LOVE the starch!

My Favorite Sandwich Bread
6 C. Flour (3 unbleached, 3 Whole Wheat)
1/4 C. Melted Butter
1 C. Warm Milk
1 C. Warm Water
1 t. Salt
1 T. Yeast
3 T. Sugar
Put 1/2 the warm water in the mixing bowl. In remaining water, add 1 T. sugar and yeast. Add Warm milk, sugar, butter, and salt to mixing bowl. Add 3 C. Flour and begin mixing. When yeast mixture is bubbly, add to bowl. Add 2 more cups of Flour. Mix well. Slowly add remaining cup of flour until dough is no longer sticky. Knead for 5 min. Turn into greased bowl and let rise 1 hr. Punch down and form into 2 bread loaves. Let rise 45 min. Put into cold oven and turn oven onto 350. Cook for 30 min. Take out, brush with butter and put back into the oven for another
5 min. Turn onto cooling racks

Monday, December 8, 2008

One of my FAVORITE Crock Pot Recipes!!!!

This truly is one of the simplest crock pot recipes EVER!!!!!!!!!!!!!! My 8 yr old makes this, it is that easy!!!!!!!!!

Crock Pot Chicken With Black Beans and Cream Cheese

Ingredients
4-5 boneless chicken breasts
1 (15 1/2 ounce) can black beans
2 C. Corn
1 (15 ounce) jar salsa, any kind
4 ounces cream cheese

Directions
Take 4-5 frozen, yes, frozen, boneless chicken breasts put into crock pot.
add 1 can of black beans, drained, 1 jar of salsa, corn. (if using canned, drain first)
Keep in crock pot on high for about 4-5 hours or until chicken is cooked.
Add cream cheese (just throw it on top!) and let sit for about 1/2 hour.
All done and enjoy!

I pull mine out before adding the cream cheese and shred the chicken and put it back... then add the cream cheese! We love to eat this with black bean tortilla chips!!!!!!!! Super easy and super good!!!! This is also a great dip (when chicken is shredded) to bring to a party!

Saturday, December 6, 2008

PUMPKIN ROLL! YUM!

SOOO, do you have a freezer full of pumpkin like I do, or a can in your pantry because you never got around to making the PIE you were going to make????
Here is a WONDERFUL and easy recipe for you to use up some of that pumpkin!!!!!!!


Pumpkin Roll
3 Eggs
2/3 C. Pumpkin
1 t. Baking Soda
1 C. Sugar
1 t. salt
1/2 t. Cinnamon
3/4 C. Flour
Filling:
8 oz. Cream Cheese
2 T. Butter
1 C. Powdered Sugar
1 t. vanilla
Mix all the cake ingredients together. Spread into a Parchment Paper lined cookie sheet. Bake at 350 for 15 min. Sprinkle top with powdered sugar, then flip onto dish towel. Pull off parchment and sprinkle with more sugar. Roll up like a jellyroll in the dish towel. Refrigerate for 1 hour.
Meanwhile, mix together
Filling ingredients.
Unroll; spread filling on
roll and roll again without
the towel. Place in
plastic wrap. Refrigerate.
Can be wrapped tight and frozen for up to 3 months!!!!
(why does blogger sometimes rotate our photos for us???? and how do you rotate them back?)
Visit passionatehomemaking for a nutritious Freezer Meal Carnival that is going on right now!!!!

Thursday, December 4, 2008

SUPER FANTASTIC COOKIES!!!

OK, I made these super yummy cookies that I found on the web....
They are
Milk Chocolate GingerSnaps

AND you can find the recipe RIGHT HERE it is the VERY TOP cookie!
Don't they look wonderful??????

Look forward to some more RECIPES from me very soon... as today I am making christmas cookies with my sister......

Monday, December 1, 2008

YUMMMMM YUMMMMM!


Today I want to share with you one of my favorite recipes for HFCS FREE candy!!!!!

THIS is super duper yummy and keeps in the fridge for a few months!

AND if you pour this into a larger pan, it is very thin and you can coat it with chocolate... it is just like a HEATH BAR!!!!!


Old Fashioned Butterscotch Candy
2 C. Sugar 2/3 C. Heavy Cream
2/3 C. Water Pinch cream of tartar
6 T. Butter, cut into small pieces
1/2 t. Vanilla extract
Place sugar in a large saucepan; add cream and water, and stir until the sugar dissolves. Add a pinch of tartar, place over medium heat and boil the mixture very slowly until it reaches the soft-ball stage-240 F on a candy thermometer. Add the butter and boil the mixture until it reaches the soft-crack stage-280 F on the thermometer.
Remove the pan from the heat and add the vanilla. Pour mixture into a deep, buttered 7" square pan. When the butterscotch is nearly cold, use the point of a knife to mark it into squares.
When it is quite cold and set, break it up and wrap each piece in wax papaer,
and keep the candy in an airtight container. ( I don't do the wrapping in wax paper, I just put it into the container!)

REMEMEBER******* Once sugar is disolved, it will RE-crystalize if a sugar crystal gets in there... so make sure you get a clean spoon once it is disolved all the way! I like to put a cover on the pan for a few min. while boiling the mixture before the SOFT ball stage! This helps get all the sugar off the sides of the pan**********

Monday, November 24, 2008

Spring at my house?????


YES- you read that right... SPRING as sprung here... at least in my kitchen it has!
This is what I wandered into the kitchen to see on Sunday Morning! What a glorious gift from God!
Just thought I would share the WARMTH (oh and this morning I woke up to snow!!!!!!!! Just not in the kitchen!)

Also, I am making APPLE BUTTER in the crock pot today... my house smells so yummy, I can't wait to CAN this later and eat it up over the next couple of months! I will also be giving some pints away for christmas! AND since we canned the apple sauce with FREE apples, the out of pocket cost is very little (with the exception of the jar!)
Can you smell the cinnamon from there??????????


Cockpot Apple Butter

8 C. apple sauce
4 C. Sugar
4 t. cinnamon
2 t. allspice
2 t. nutmeg
2 t. cloves

Stir altogether and place in a crockpot, cover off, turned on high for 6-7 hours.
Fill pint jar and hotwater bath for 10 min.
Can also be frozen or stored in the fridge for a month.

Just think, this on top of pancakes with some whipping cream whipped up! YUM, apple pie for sure!!!!!!! OR spread on some homemade apple bread......Look for this recipe in the near future! It is a long time favorite at our house!

Thursday, November 6, 2008

TOOTSIE ROLLS

Alright, who loves tootsie rolls???? I know I USED to love them! They used to be one of my MOST FAVORITE candies!!!!!!!!! But after reading the lable one day, I had to GIVE THEM UP!

here is what the REAL ONES... have in them....

INGREDIENTS:Sugar, corn syrup, partially hydrogenated soybean oil, condensed skim milk, cocoa, whey, soya lecithin, artificial and natural flavors

Here is what mine have in them.....

1 C. Sugar
1/2 C. Sugar syrup (homemade-like corn syrup)
1/4 C. Butter
1/4 C. Cocoa
1/4 C. Sweetened Condensed Milk
2 T. Water
1/2 t. vanilla
Pinch of salt


No corn syrup, no HYDROGENATED oils, no whey, no soya lecithin, and NO artificial flavors!!!!

THEY were hard to make though, I will tell you that! This is what it did to my hands after the first 10 min of pulling and twisting the candy! (see the NICE little blister??? OUCH!)
AND they were very hard to twist and pull the second time around... and hard to roll into snakes! BUT they do taste yummy, so I will maybe do them again someday!!!!!!!!!!!! For now we will slowly eat our yummy candy and make it last!!!!!!!!!!!!!!!!!!!!!!!!!!!!!!!!!!!
**********************UPDATE****************
These things were good when they were first done! BUT they got all dry and crumbly after sitting in a container for a few hours... GGGGGGGGGGRRRRRRRRRR!!! I will have to try that again!!!!!!!!
I also made ENGLISH MUFFINS today! YUMMY! I will have to do a tutorial on those next time I make them!!!!!!!!!!!!!!!!!!!!!!!!!!!!!!!!!!!!!!!


I did learn that the VERY BEST way to cut them is to NOT cut them at all, but to "CUT" them with a fork! Poking it is all around it! VERY AIRY! YUMMMMMMMMMMMMMM!

Monday, October 6, 2008

Pumpkin Apple Muffins!!!!

OK, here is the recipe I promised a few days ago... These are sooooo soooo GOOD! They are almost like a yummy spice cake! TOOO good to be true!!!!!!!

2 1/2 C. Flour (I used White Whole Wheat)
1 T. Pumpkin Spice
2 C. Sugar
1 t. Baking Soda
1/2 t. Salt
2 Eggs
1 C. Pumpkin (can use canned, I used real)
1/2 C. Oil
2 C. Chopped Apples

Combine Dry ingredients. Combine Wet ingredients. Stir wet into dry just until moist. Fold in Apples. Fill 18-20 lined or greased muffin cups.
COMBINE: 1/3 C. Sugar, 3 T. Flour, 1/2 t. Cinnimon. Cut in 4 T. Butter until Crumbly. Sprinkle over muffins. Bake at 350 for 25-30 min or until done!

Try these today!!! You won't be let down. These also freeze very well, so don't be scared at the 18-20 muffins worth! (Mine made 22 muffins with a 3 T. scoop!)

Friday, October 3, 2008

YUMMY in my TUMMY!!!!

Do you smell something??? AAHHH, it smells sooooo darn good in my house right now!
Here are the things I am baking today! (because I know I have to work for 30 hours tonigt through sunday evening and won't get a chance to cook again except everyone elses food at work!)

FIRST we have a yummy brownie that is made from a recipe I found HERE ....

OH, it is so fudgy and de-lish!!!!! Just the way I love them!

(NOTE: Brownies are my FAVORITE FOOD!)


THEN I made some Pumpkin Apple muffins (I will post the recipe later!) They are SOOO Super yummy! Tastes alittle like Carrot cake which is strange because there is no carrot in them! I had to make these since I wanted to try the pumpkin I cooked down yesterday!


Last there is a popcorn muffin! Yep, POPCORN!!!! I have never tried these before and am VERY impressed! I found the recipe HERE... You must try these, they would be soooo wonderful with supper!!!! (the recipe says it make 12... but I got 19 with the 3T. scoop!)
UPDATE:::::: THESE DO NOT FREEZE WELL!!!!! THEY ARE ACTUALLY HORRIBLE IF YOU FREEZE AND THEN THAW THEM! THEY ARE FANTASTIC OUT OF THE OVEN, JUST NOT A "EAT ME LATER" KIND OF MUFFIN!!!!


I do have some bread dough rising on the counter that I need to punch down and bake up! I have been having a hard time with bread lately but still am trying to find a good sandwich bread recipe (this may be my last try if it doesn't turn out!!!!!!)


Time to clean up the kitchen and sew up some things before I head out to work for the weekend! Maybe a nap sounds better than sewing????? MAYBE!!!!!

Tuesday, September 30, 2008

COLD WEATHER = HOT CHOCOLATE!!!!

Now that I just got in from the garden (those darn beans won't stop!!!!), I decided it was cold enough to NEED some HOT CHOCOLATE!!! I used to buy SWISS MISS, ya know, the convienent little packages, but because they are FULL of WHO KNOWS WHAT??? I decided that I needed to make my own little packets..... SOOO here is how you do it!!!!

First you will need POWDERED MILK, COCOA, and SUGAR

Next, put 1/3 C. Powdered Milk in each little baggie


Then, put 1 Table Spoon of Cocoa in the baggie


Then you put in 1 Table Spoon of Sugar in each baggie


And for the LAST STEP, you seal the baggie up and mix it around!!!!!


There you have it! A little packet of HOT CHOCOLATE MIX! Just Add to 1 C. of Boiling Water and stir VERY WELL! Let cool until you are able to sip it!!!!!! Because we all know that playing in the snow is much more fun if we know HOT CHOCOLATE is waiting for us in the Kitchen!!!!

Monday, September 29, 2008

PUMPKIN CHIP MUFFINS!!!!!


These are one of our VERY favorite muffins!!! They freeze VERY well! I do use Canola Oil, Whole Wheat Flour and sometimes Vanilla yogurt if that is what I have on hand (even homemade yogurt works great!) I do use muffin liners, but if you don't, make sure to grease your cups! I also use the LARGE scoop from Pampered chef to fill my cups! 3 T. is the perfect Muffin cup amount!!!!!!


Pumpkin Chip Muffins
4 eggs
1 Can of Pumpkin
3/4 C. Plain Yogurt
2 C. Sugar
3/4 C. Oil
3 C. Flour
2 t. Baking Soda
2 t. Baking Powder
1 t. Cinnamon
1 t. Salt
1 C. Mini Chips

In a bowl, beat eggs, sugar, pumpkin, oil, and yogurt until smooth. In another bowl combine the dry ingredients Add to wet mixture until moistened. Fold in chips. Fill 36 muffin cups.
Bake for 17-19 min @ 400.

Monday, September 15, 2008

Two Great HOMEMADE (used to be Store bought) RECIPES

I thought Today I would share two of my very favorite things that I NOW make homemade instead of buying it! These are easy and GREAT!!!!!

Pancake Syrup
(my kids HATE the taste of REAL maple syrup, so here is what I do to fix that!)

2 C. Sugar
1/2 C. Brown Sugar
1 C. Water
2-3 T. REAL Maple Syrup
1-2 t. Vanilla

In a large saucepan combine the white sugar, brown sugar and water; bring to a boil, lower heat and simmer stirring for 3 minutes.
Remove from heat and stir in vanilla and maple syrup; cool to almost room temperature, then I like to put it in a MASON JAR! Seal tightly and refrigerate.
This will thicken more when it cools in the fridge!

(YES, I do realize that that is ALOT of sugar... but it has NO corn Syrup like other store bought syrup, and if I have whipping cream on hand, my kids would much rather have that than syrup anyways... cause you can eat it with REAL FRUIT!)

and this is the BEST over HOMEMADE CUSTARD ICECREAM!!!!

Magic Shell Chocolate Sauce

1/2 C. Butter
6 oz. Chocolate chips (either semi-sweet OR milk chocolate)
1 t. Vanilla

Melt butter over medium-low heat in a medium saucepan.
Add the chocolate chips.
Whisk them around until they are melted.
Add the vanilla.
Pour the delicious sauce over any flavor ice cream.

I store this in a PINT MASON JAR in the fridge. All you do to use it OVER and OVER again is put the jar in the microwave for 30-45 seconds (depending on how much is left in the jar!)
This is so good!!! I think when this batch is GONE, I will try adding toffee to it!!!!! YUMM!!!!

Monday, September 8, 2008

Taco Seasoning Mix

OK, so I am a BIG huge McCormick Taco Seasoning FAN!!!! To me there is NOTHING better.... BUT the price keeps going up and up and up and with having to spend more money on healthy food, I thought I would try and find ways to cut money other places.... SOOO here is a recipe that is ALMOST as good and the McCormicks!

2 t. Minced Dry Onion
1 t. Chili Power
1/2 t. Dried Red Peppers, crushed
1/4 t. Dried Oregano
1 t. Salt
1/2 t. Cornstarch
1/2 t. Garlic powder
1/2 t. Ground Cumin

Mix all together and store in a cool dry place... this makes JUST ABOUT 2 T. of mix. Use like you would any other taco seasoning packets.

What I like to do is mix up about 4 packets worth... then just use 2 T. of the mix when I make Taco's OR My VERY VERY favorite

TACO SOUP

1 lb. Browned Hamburger (you can omit this for a Meatless meal , I usually just use whatever leftover taco meat is in the freezer)
1 Can Kidney Beans (light or dark)
1 Can Black Beans
2 Cans Diced Tomatoes (I like to use my garden canned pints)
1 Packet Hidden Valley Ranch Seasoning (we buy this in bulk at Sams Club... so then I use 2 T.)
2 Cans Corn
1 Packet Taco Seasoning (or 2 T. Taco Mix from above)

Place ALL of the ingredients into a large pot. Bring to a boil, reduce heat and simmer for 15 min. Serve with Shredded Cheese and Sour Cream. It is VERY FUN to eat with Totilla Chips!